Preparing (1h 40min)
- Before starting, we should disinfect all surfaces and dishes that may come into contact with milk.
- Determine whether milk is suitable for making cheese. It has to go through the bactericidal phase (cold milk from the previous day usually works). If you have a PH meter, the PH level of milk should not be outside the PH 6.55–6.75 range (which is very rare).
- Pasteurize milk: heat it to 65 °C and keep it at this temperature for 30 minutes. Can heat up to 70 °C and hold for 15 minutes.
- Quickly cool the milk, for example, in a cold bath to 30 °C (it could take 15 minutes), or heat the already pasteurized milk.
|
Processing (4h)
- Adding cheese cultures Micromilk ME (1.2 gr.), Micromilk LHT/A (1.2gr.).
- Wait 5 minutes and stir the cheese culture into the milk and leave it for 60 minutes.
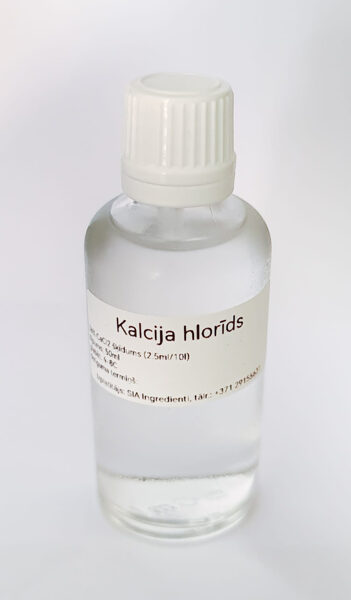
- Add calcium chloride (2.5ml) and rennet (0.85ml) into milk and stir within 60 seconds. Calcium chloride and renin must be diluted before adding to the milk with 50ml of clean water first.**
- After adding a rennet, start the timer to determine the flocculation point. Generally, the flocculation point for most of the cheeses is 3. That means that if the milk has thickened (forms a curd) within 12 minutes, you can move on to the next stage only after 36 minutes (12x3 = 36 minutes).
- Cut the curd into 1.5cm cubes, approximately, and leave for 10 minutes
- Cut in half finer and leave for 5 minutes
- In the meantime, prepare 3 liters of water at temperature 50-55C (it is important that the water is clean and boiled before).
- Slowly and carefully stir for 5 minutes and leave for 10 minutes.
- Remove the whey to the grain level using a strainer and a soup cup or another vessel.
- Stir the cheese mass so that it does not stick together.
- In 20 minutes, add pre-prepared water at 50-55C in small portions to the milk until the temperature in the pot will be 37-38C.
- If the temperature is a little lower, you can heat it up quickly. If you use other volumes, you can use online calculators to calculate the amount of hot water and temperature that must be added to get the correct result: https://www.onlineconversion.com/mixing_water.htm
- After reaching a temperature of 37C, stir continuously for 40-50 min.
- Then drain the whey.
|
Pressing and salting (9h 15min + 6h)
- Mix the drained cheese mass, put it in a mold and leave it for 15 min for self-pressing.
- After 15 minutes, turn it around and put it under the press for 1 hour (2kg).
- After 1 hour turn around and put under the press for 2 hours (2kg)
- After 2 hours take the cheese out of the press mold and remove the cheesecloth. Let's turn around cheese and put it in the form already without cloth and without a press for 6 hours, to make smooth cheese shape.
- Salt the cheese for 5 hours (for 1 kg of cheese), sprinkle the surface of the cheese with a little salt and put in the refrigerator. Turn around when half of the salting time will pass.
- Take the cheese out of the salting solution, dry it with a paper towel and leave it at room temperature (20C) for 1 day.
- Making this cheese takes less time and after 1 month it will already be delicious.
- When cheese surface will become dry, it can be covered with wax, polyacetate or vacuumed.
|
We look forward to your feedback!
* Freshly milked milk has bactericidal properties for a few hours, during the so-called bactericidal phase, when bacteria suppress reproduction. Cooling the milk prolongs the bactericidal phase. If the milk is obtained in strict compliance with sanitary regulations and rapidly cooled to +40 °C, the duration of the bactericidal phase is 24 hours and more. At the same temperature bactericidal phase period, impure milk has at least two to three times shorter temperature. The duration of the unrefrigerated milk phase is, on average, 2 hours.
(Source: http://www.ezerzeme.lv/lv/zinas/noderigi/5222/par-piena-kvalitati)
**
The time of milk coagulation (thickening) depends on the quantity of calcium chloride and rennet. It can be adjusted for best coagulation time, which should ideally be 12 minutes. For instance, if the first time your milk has thickened after 20 minutes, then increase the next dose of enzyme.
*** During pressing, the cheese releases whey and also increases the level of acidity, which is an important regulatory process in bacteria. If you slightly increase this pressing time, then it will be easier to melt the cheese. Such cheese is perfect for hot buns or in pizza making. If the pressing time is too long, it will lose its elasticity and become fragile.